TLDR
- A heat press gives the most consistent results for DTF transfers at home.
- Most DTF transfers press well around 300°F to 325°F for 10 to 15 seconds with medium-to-firm pressure, but always follow the instructions from your transfer supplier first.
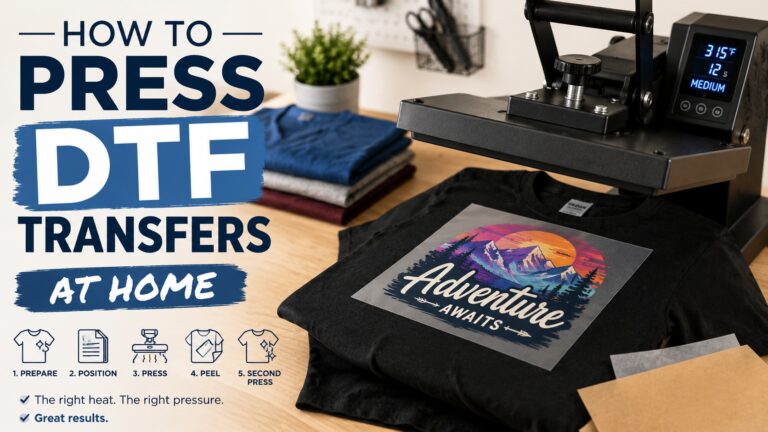
- Pre-press the garment, align the transfer carefully, press once, peel based on the film type, then do a short second press.
- Wait at least 24 hours before washing the garment, then wash inside out with cold water and avoid high heat.
Pressing DTF transfers at home is pretty simple once you understand the order of operations. The hard part is not the press itself. It is getting the pressure, heat, peel timing, and garment prep right so the design actually bonds to the fabric.
That is why this guide on how to press DTF transfers at home focuses on the practical steps. You do not need a commercial print shop setup to make custom shirts, hoodies, totes, or small merch batches. But you do need a clean workspace, the right heat setting, even pressure, and a little patience. That last part matters more than people want it to.
DTF stands for direct-to-film. The design is printed onto a film, backed with adhesive powder, cured, and then pressed onto fabric with heat and pressure. If you order ready-to-press DTF transfers, the printing and curing are already handled. Your job at home is to apply the transfer cleanly.
Here is how to do it.
What You Need to Press DTF Transfers at Home
Before you start, gather everything first. Once the heat press is hot, you do not want to be looking for scissors or a cover sheet.
You will need:
- A ready-to-press DTF transfer
- A heat press, Cricut-style press, or household iron
- A clean garment, tote, hoodie, or fabric item
- Parchment paper, kraft paper, or a Teflon cover sheet
- Heat-resistant tape, especially for small or tricky placements
- Scissors, if you need to trim around the transfer
- A lint roller
- A firm, flat pressing surface
- A ruler or shirt alignment guide, optional but helpful
A clamshell or swing-away heat press is the best option because it gives steady heat and pressure across the full design. A handheld heat press can work for small designs, but you need to press evenly. A household iron is the least consistent option, but it can work for simple applications if you are careful.
The main issue with an iron is pressure. Steam holes, uneven heat, and curved edges make it harder to get a smooth press. Turn the steam off, use the hottest safe setting for the fabric, and press with firm downward pressure. Do not slide the iron around like you are removing wrinkles. That can shift the transfer.
Best Heat Press Settings for DTF Transfers
Most DTF transfers use a pressing range around 300°F to 325°F, medium-to-firm pressure, and 10 to 15 seconds. That is a common starting point, not a universal rule.
Always check the instructions that came with your transfer first. DTF films vary. Some are hot peel, some are warm peel, and some are cold peel. Some suppliers recommend 300°F for 10 seconds. Others recommend 315°F or 320°F for 12 to 15 seconds.
For a home setup, a safe general starting point is:
- Temperature: 300°F to 325°F
- Time: 10 to 15 seconds
- Pressure: medium to firm
- Peel: hot, warm, or cold depending on the film
- Second press: 5 to 10 seconds with a cover sheet
Fabric matters too.
For cotton shirts, the standard range usually works well. For polyester, performance wear, tri-blends, or heat-sensitive garments, use the lower end of the recommended temperature range and test first. Polyester can scorch or leave press marks if the heat is too high.
For hoodies and thicker garments, pressure matters more than extra time. If the transfer does not bond well, do not immediately crank up the heat. Check pressure, seams, zippers, pockets, and uneven fabric first.
Step 1: Prepare the Garment
Start with a clean, dry garment. DTF transfers do not like moisture, lint, wrinkles, or fabric coatings.
Lay the garment flat on the lower platen. Smooth the fabric with your hands. Use a lint roller over the pressing area. This is a small step, but it helps prevent specks from getting trapped under the transfer.
Then pre-press the garment for about 3 to 10 seconds.
The pre-press does three things:
- Removes moisture from the fabric
- Flattens wrinkles
- Warms the pressing area slightly
Do not skip this step if the shirt has been stored in a garage, basement, warehouse, or humid room. Fabric can hold more moisture than you expect.
After pre-pressing, let the garment settle for a moment so it is flat and smooth.
Step 2: Trim and Position the DTF Transfer
Trim the transfer if needed. You do not need to cut right up to the artwork, but removing excess film can make placement easier.
Place the transfer on the garment with the design facing up. With most ready-to-press DTF transfers, the image should look correct when you place it on the shirt. The adhesive side faces the fabric.
Take your time here. Placement is one of the easiest things to mess up because the actual pressing step feels more important. But once the transfer is pressed, it is not moving.
Common placement guidelines:
- Left chest logo: usually 3 to 4 inches wide
- Full front adult shirt: usually 10 to 12 inches wide
- Youth shirt front: usually 7 to 9 inches wide
- Sleeve logo: usually 2 to 4 inches wide
- Tote bag design: center visually, not always mathematically
For shirts, use the collar and side seams as guides. For hoodies, watch the pocket and neckline. For tote bags, smooth the fabric and make sure handles are out of the way.
If the transfer might shift, use heat-resistant tape on the corners. Do not use regular tape. Regular tape can melt, leave residue, or mark the garment.
Step 3: Cover and Press the Transfer
Place parchment paper, kraft paper, or a Teflon sheet over the transfer. This protects the film and helps prevent direct contact with the press platen.
Close the heat press with medium-to-firm pressure. Press for the recommended time.
For many home applications, this means around 300°F to 325°F for 10 to 15 seconds. Again, use your supplier’s settings first.
Good pressure should feel firm, but not extreme. If the press is hard to close, pressure may be too high. If it closes with almost no resistance, pressure may be too low.
Uneven pressure is one of the most common DTF problems at home. Watch for:
- Thick seams
- Hoodie pockets
- Zippers
- Buttons
- Collar edges
- Fabric bunching
- Pressing pillows that are too soft
If part of the design sits over a seam or pocket edge, the press may not make full contact. Use a pressing pillow or pad to raise the print area, but make sure the design still gets firm pressure.
Step 4: Peel the Film Correctly
Peeling is where many DTF transfers fail.
There are three common peel types:
- Hot peel: peel shortly after opening the press
- Warm peel: wait a few seconds, then peel while warm
- Cold peel: let the transfer cool completely before peeling
Do not guess if your transfer came with instructions. Follow the peel type exactly.
For hot peel, wait a couple of seconds, grab a corner, and peel in one smooth motion. For warm peel, give the transfer a little more time before peeling. For cold peel, remove the garment from the press area and let it cool fully.
Peel low and slow. Keep the film close to the garment rather than pulling straight up. A low angle helps reduce stress on the design.
If part of the transfer lifts, stop. Lay the film back down, cover it, and press again for a few seconds. Do not keep peeling while the design is lifting. That is how small issues turn into ruined shirts.
Step 5: Do a Second Press
After peeling the film, cover the design again with parchment paper, kraft paper, or a finishing sheet. Press for another 5 to 10 seconds.
The second press helps set the transfer into the fabric and can improve the final feel. It can also reduce extra shine depending on the cover sheet you use.
Different cover sheets can create slightly different finishes:
- Parchment paper often gives a softer, more natural look
- Teflon sheets can leave a slightly glossier finish
- Kraft paper can create a more matte finish
This is worth testing if you care about the exact finish. For a brand selling shirts, consistency matters. Pick one cover sheet and use it every time.
Can You Press DTF Transfers With an Iron?
Yes, you can press some DTF transfers with an iron, but a heat press is better.
An iron can work for small designs, simple artwork, and personal projects. It is not ideal for selling shirts because the results are harder to repeat. The biggest problems are uneven heat and uneven pressure.
If you use an iron:
- Turn off steam
- Use a firm, heat-safe surface
- Do not use an ironing board if it feels soft or bouncy
- Cover the transfer with parchment paper
- Press down firmly without sliding
- Work in sections for larger designs
- Let the transfer peel according to its film type
- Do a second press after peeling
The risk with an iron is that one area bonds well and another area does not. That can cause lifting after washing. For one or two shirts, it may be fine. For customer orders, use a real heat press.
Common DTF Pressing Mistakes
Most DTF issues come from a few repeat mistakes.
Not Enough Pressure
If the print lifts during peeling or starts peeling after washing, pressure may be too low. DTF adhesive needs firm contact with the fabric.
Too Much Heat
More heat does not always mean better adhesion. Too much heat can scorch fabric, flatten texture, leave press marks, or make the print feel rough.
Peeling at the Wrong Time
A cold peel transfer peeled hot can lift. A hot peel transfer left too long may not release cleanly. Follow the peel instructions.
Skipping the Pre-Press
Moisture and wrinkles can interfere with adhesion. Pre-pressing only takes a few seconds.
Pressing Over Seams
Seams create uneven pressure. Move the design away from thick seams when possible or use a pressing pad to level the area.
Washing Too Soon
Give the transfer time to fully settle before washing. Waiting at least 24 hours is a smart rule for most DTF garments.
How to Care for DTF Shirts After Pressing
Good pressing matters, but washing habits matter too.
For longer-lasting DTF prints:
- Wait at least 24 hours before the first wash
- Turn the garment inside out
- Wash with cold water
- Use mild detergent
- Avoid bleach
- Avoid fabric softener when possible
- Tumble dry low or hang dry
- Do not iron directly on the print
- Avoid dry cleaning unless the transfer supplier says it is safe
High heat is the enemy. A good DTF transfer can hold up well, but repeated hot washing and high-heat drying will stress almost any printed garment over time.
If you are selling apparel, include a small care card with the order. It helps customers protect the print and reduces avoidable complaints.
Troubleshooting DTF Transfers at Home
The Design Is Lifting After I Peel
Press it again. Lay the film back down if you still have it, cover the design, and press for a few more seconds with firm pressure. If it keeps lifting, check your pressure and peel timing.
The Shirt Has a Box Mark From the Press
The temperature may be too high for the fabric, or the pressure may be too heavy. Polyester and blends are more likely to show marks. Try a lower temperature, shorter press, or pressing pillow.
The Print Feels Too Shiny
Try a second press with parchment paper or kraft paper instead of a Teflon sheet. The cover sheet can affect the finish.
The Print Cracks After Washing
The transfer may have been under-pressed, washed too soon, dried on high heat, or applied to a fabric that did not accept it well. Check the original press settings and garment type.
The Transfer Looks Crooked
This is a placement problem, not a heat problem. Use a ruler, shirt guide, or center line method before pressing. Once applied, DTF transfers are not meant to be repositioned.
Best Home Projects for DTF Transfers
DTF transfers are useful because they work on many common fabric items. They are especially good for full-color artwork, detailed logos, small text, gradients, and designs that would be annoying to weed with vinyl.
Good home projects include:
- Custom t-shirts
- Hoodies
- Tote bags
- Team shirts
- Small business merch
- Event apparel
- Staff uniforms
- Family reunion shirts
- Sleeve prints
- Left chest logos
- Small-batch product launches
DTF is also a good option when you want to test a design before ordering a larger apparel run. You can press one shirt, wash it, wear it, and decide if the design, size, and placement feel right.
Final Checklist Before You Press
Before you close the press, check these details:
- Is the garment clean and dry?
- Did you lint roll the press area?
- Did you pre-press the fabric?
- Is the design facing the right direction?
- Is the placement centered and straight?
- Are seams, zippers, or pockets affecting pressure?
- Is the press set to the supplier’s recommended temperature?
- Is the pressure medium to firm?
- Do you know whether the transfer is hot, warm, or cold peel?
- Do you have a cover sheet ready for the second press?
This checklist takes less than a minute. It can save the whole shirt.
Conclusion
Pressing DTF transfers at home is mostly about control. Control the temperature. Control the pressure. Control the placement. Control the peel.
Once you have those steps down, the process becomes repeatable. Pre-press the garment, line up the transfer, press with steady pressure, peel at the right time, and finish with a second press. Then let the garment rest before washing.
For personal projects, that is enough to make clean shirts at home. For small business orders, it is worth testing your exact garment, transfer, press settings, and wash routine before selling the final product. A little testing upfront makes the finished apparel feel much more reliable.